How to Import CSV Files
Last updated: October 6, 2026
Import CSV files to add or update Accounts, Projects, and Opportunities in bulk. When importing Projects or Opportunities, Coperniq automatically creates the associated Accounts.
Before you begin, prepare a CSV file no larger than 15 MB, with a header row and the information you want to import.
1. Upload Your File
Click the Settings icon in the bottom-left corner.
Under Company Settings, select Import Records.
Click Upload file, or drag and drop your CSV into the upload area or use Import from another software to transfer data directly from another CRM.
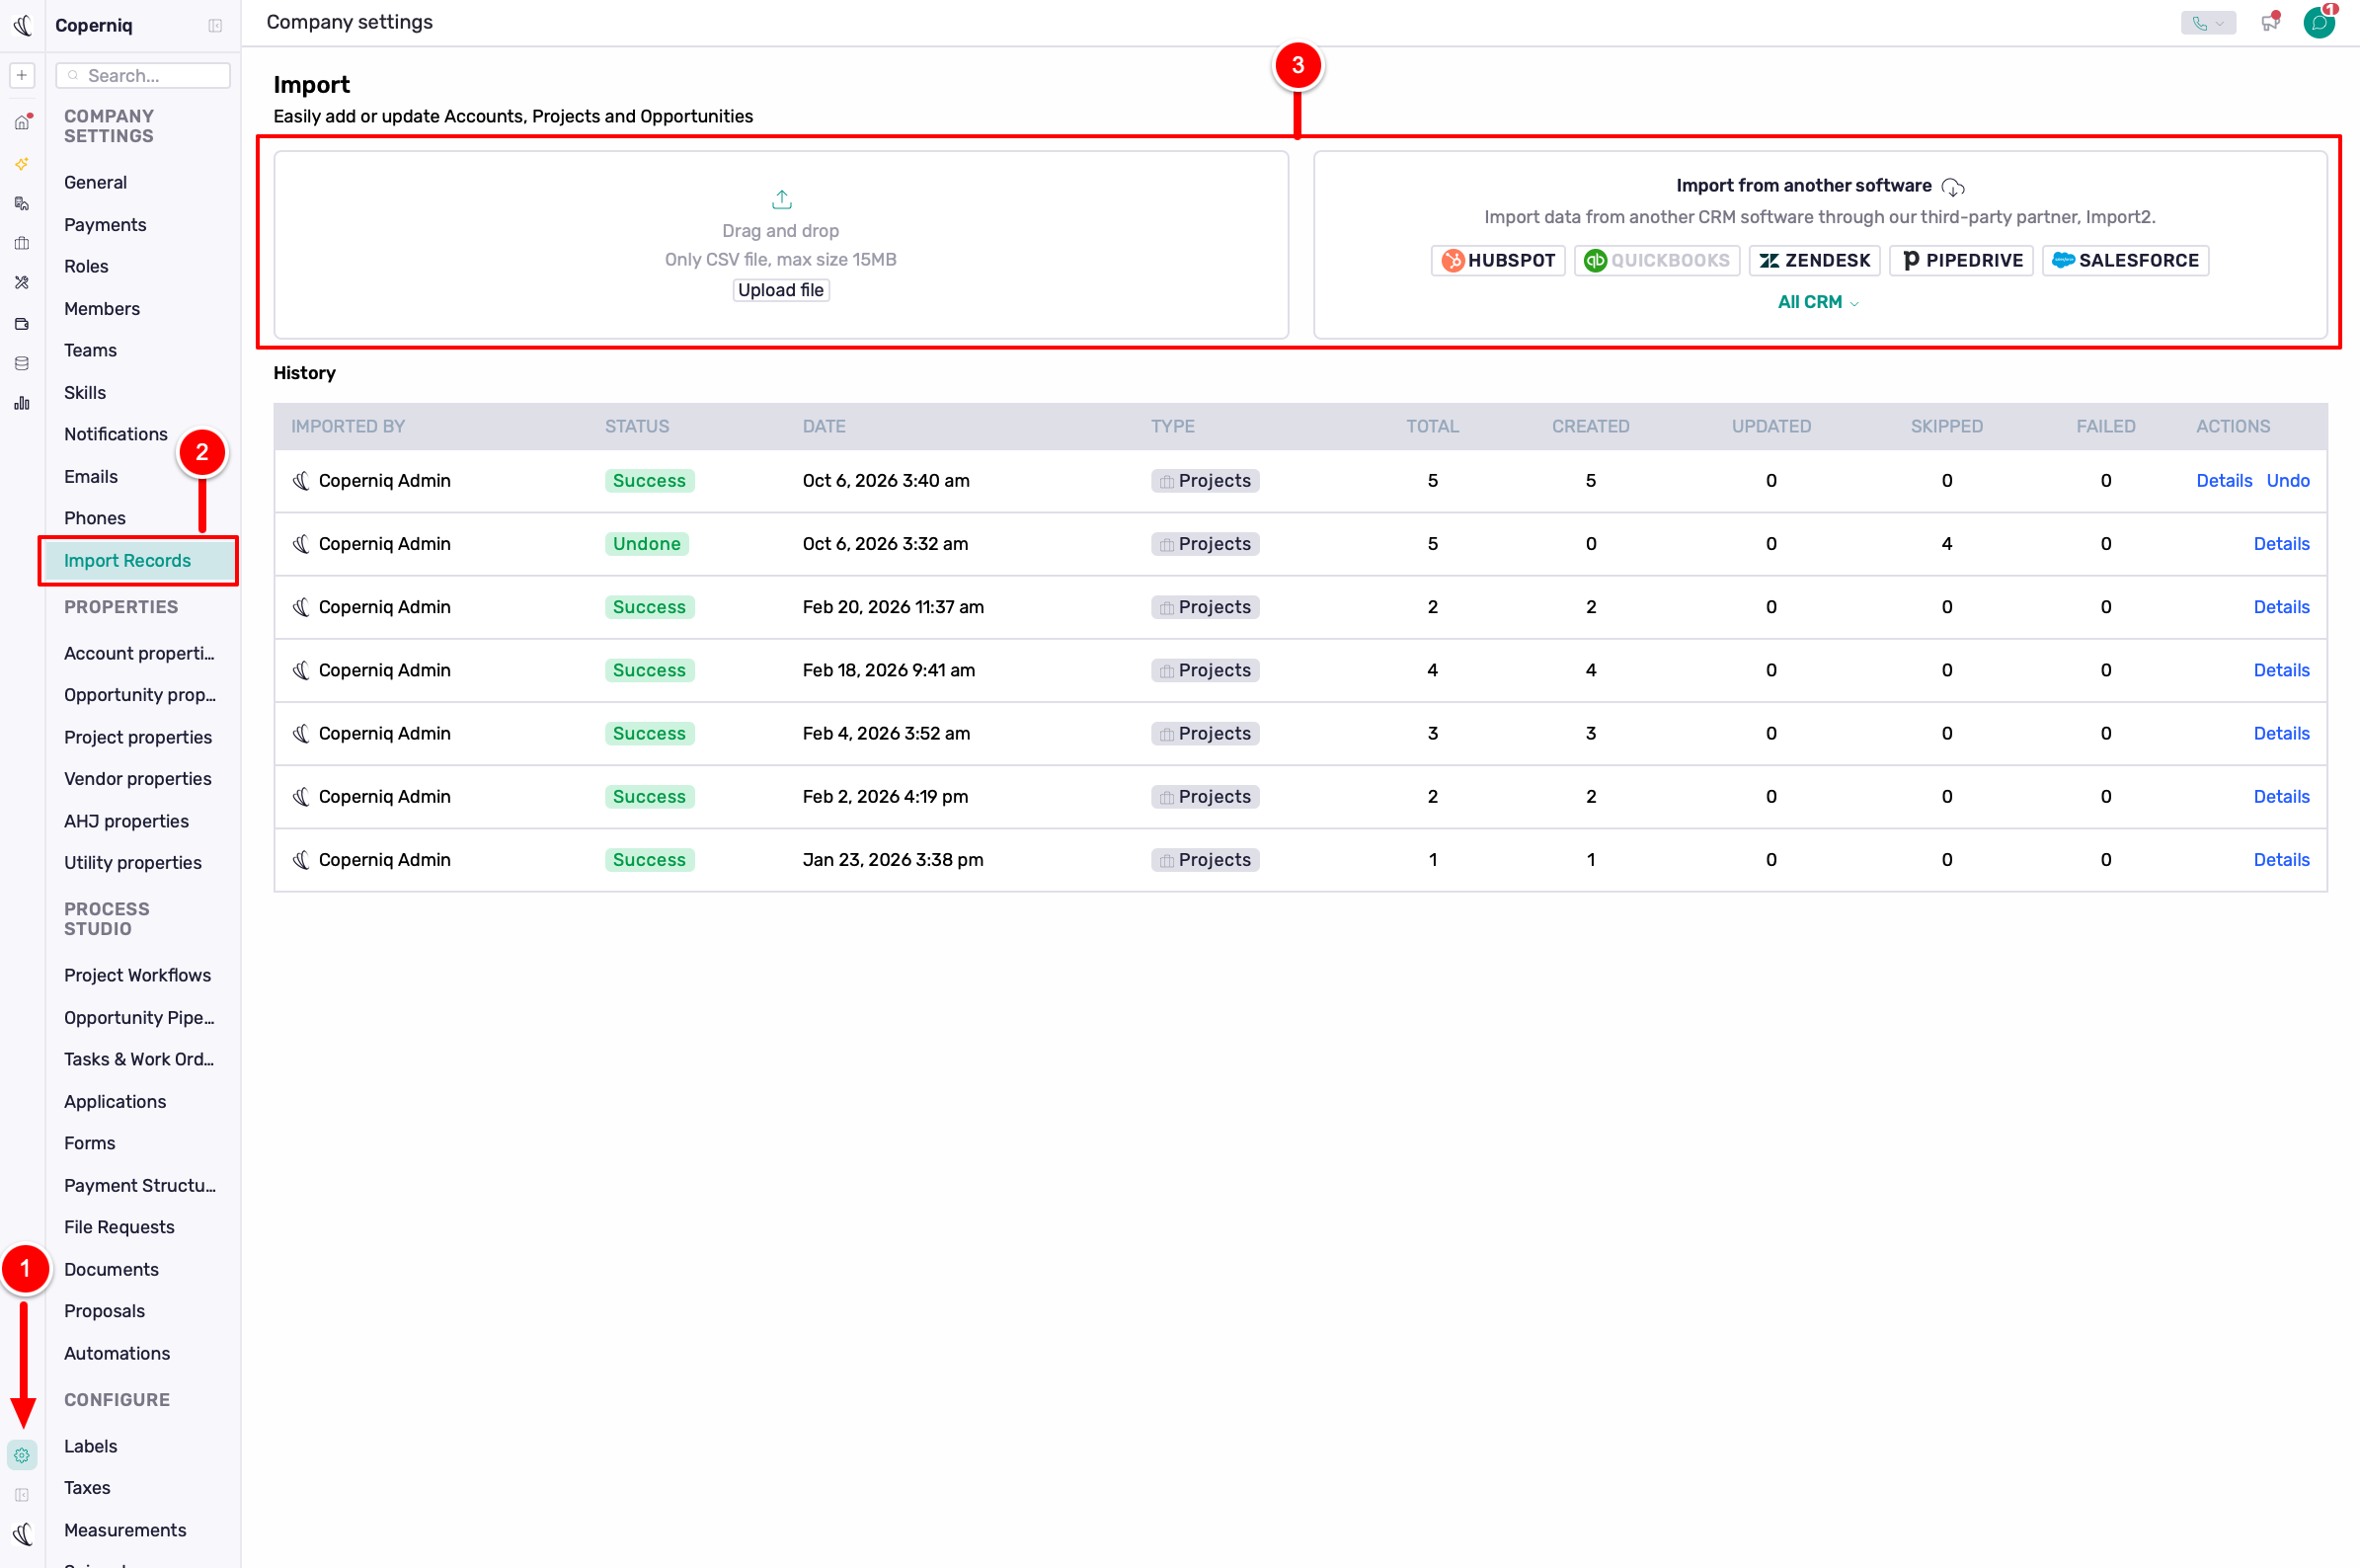
Once you upload your file, Coperniq will analyze it and open Map Fields. This may take a few seconds or longer, depending on the file size.
2. Map Your Fields
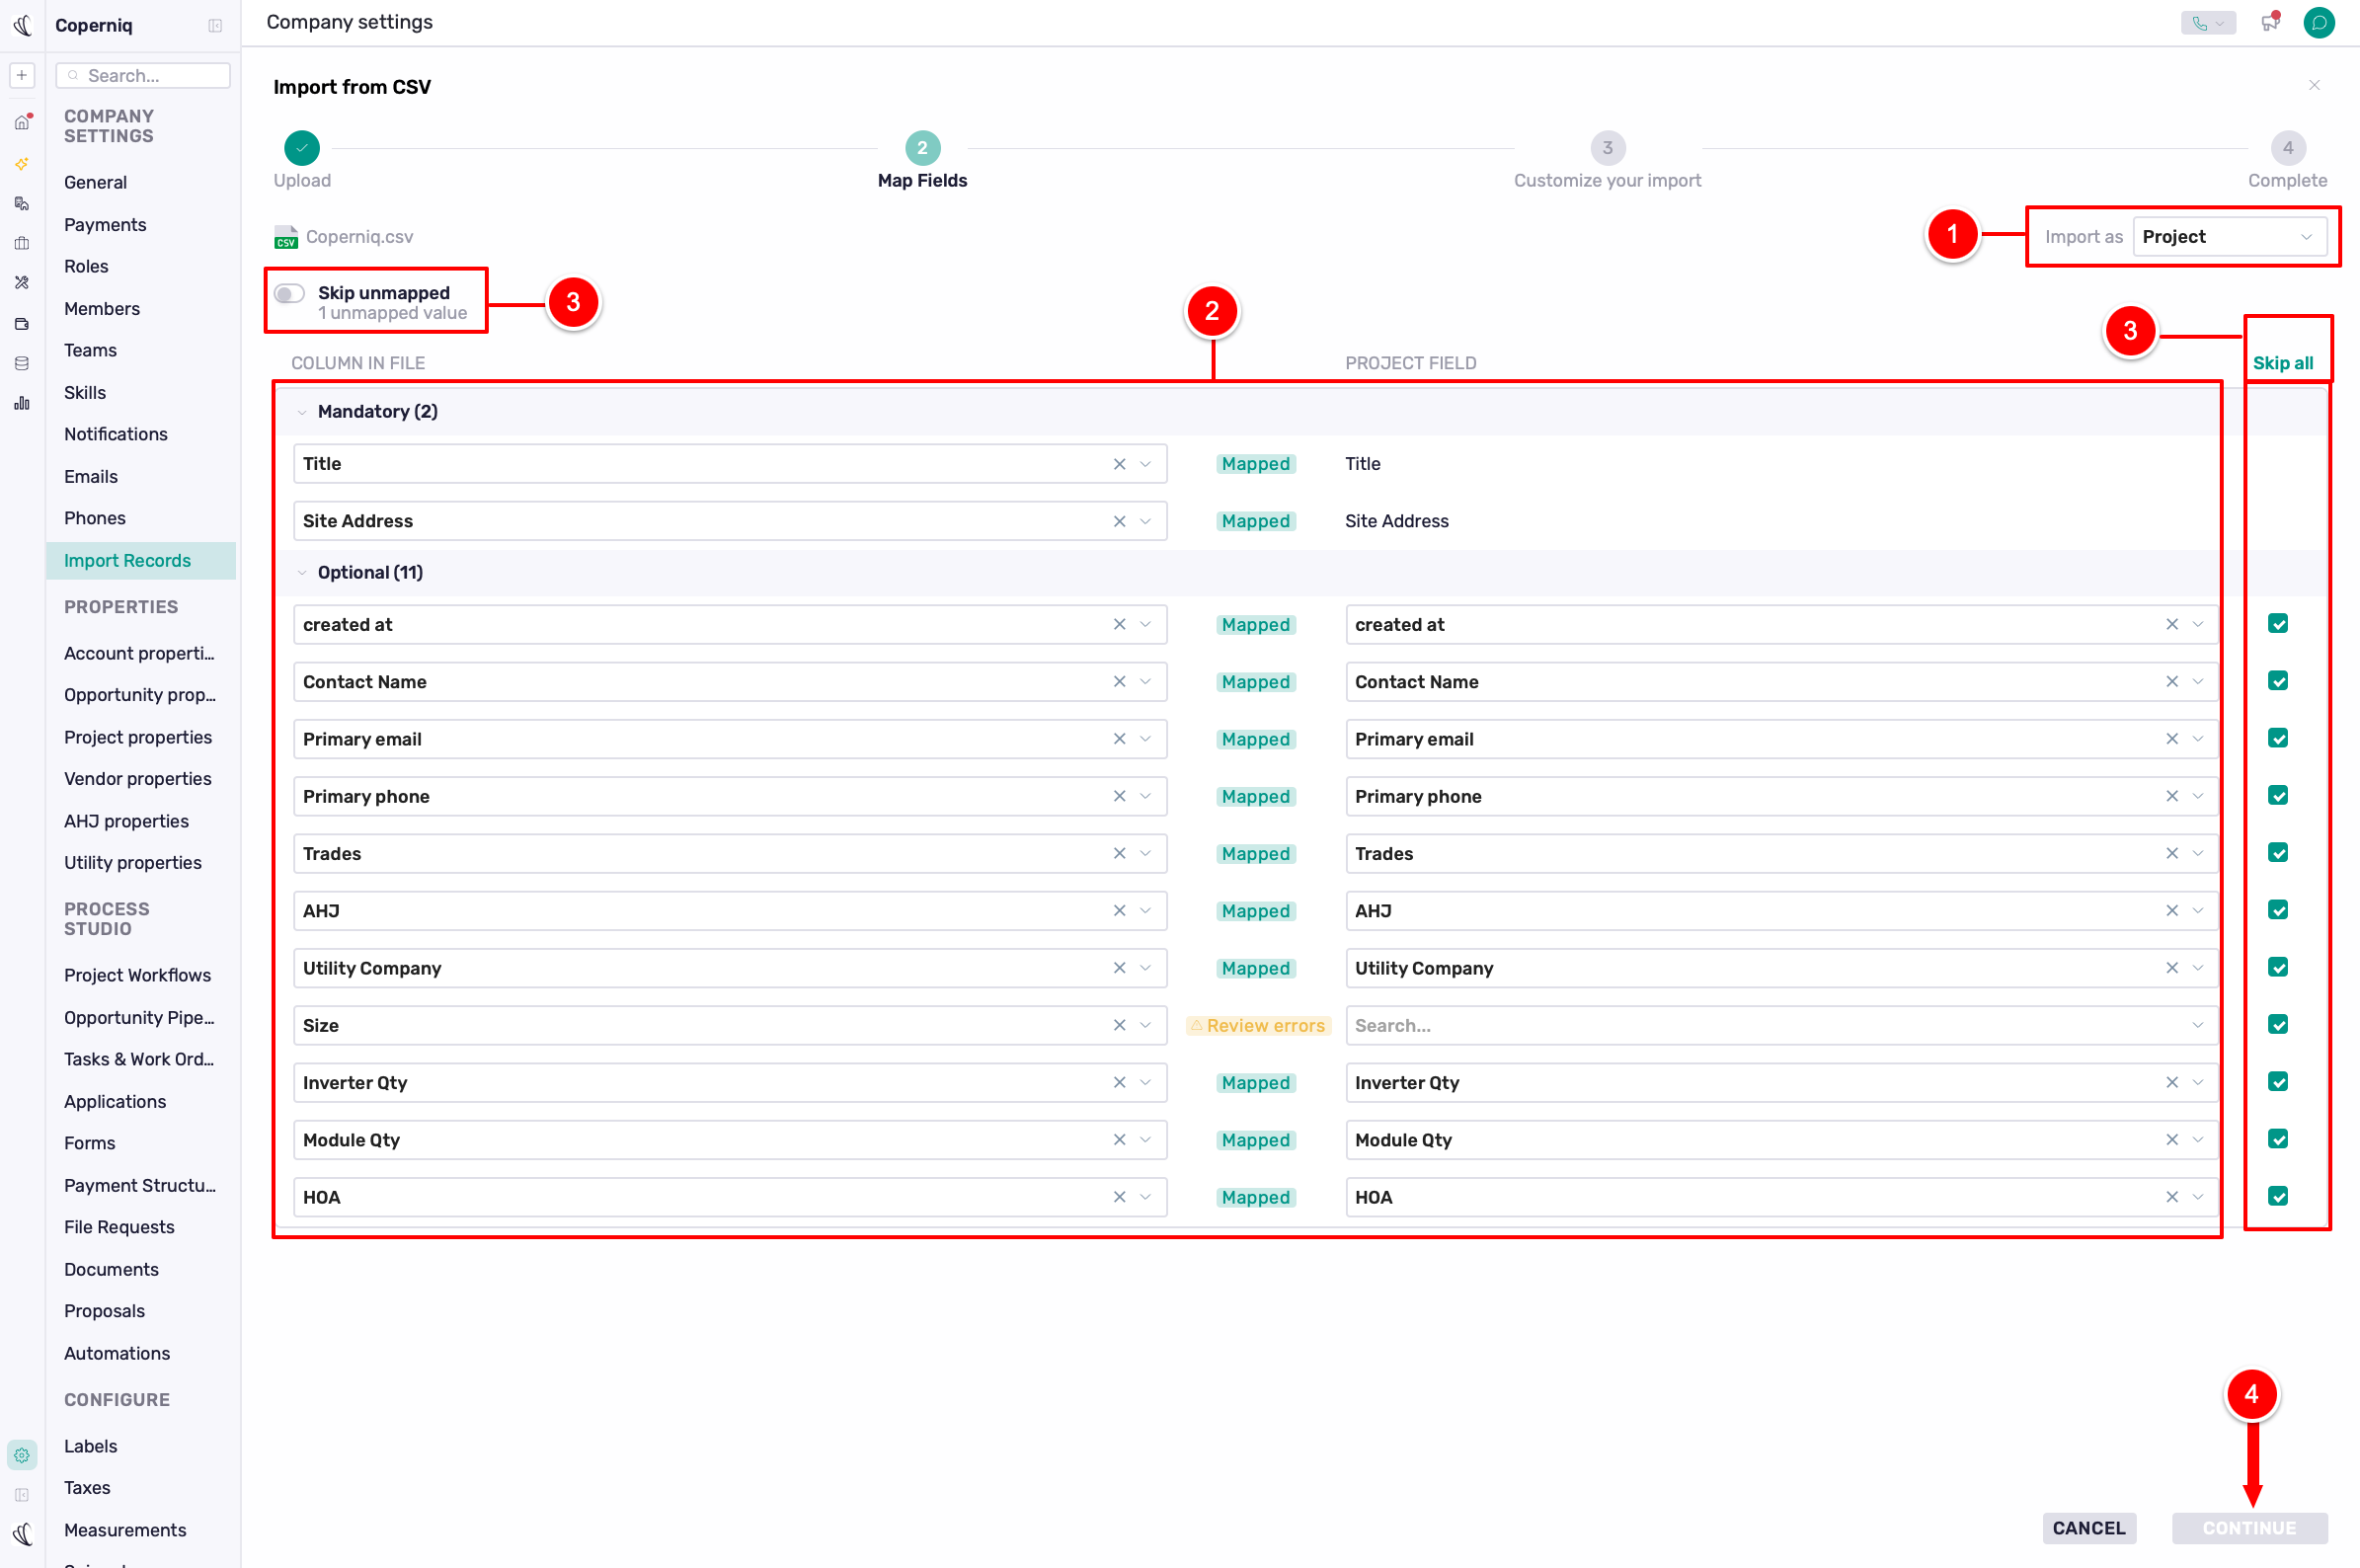
Select the record type: In the Import as dropdown at the top-right, choose Project, Account, or Opportunity.
Map fields: Match your CSV columns to the corresponding fields in Coperniq under Mandatory and Optional. If a Coperniq property isn’t listed, click + Property in the dropdown to create it.
Exclude fields: Use Skip unmapped, Skip all, or the individual checkboxes to exclude fields from the import.
Review your mappings: Resolve any items marked Review errors, then click Continue.
3. Customize Your Import
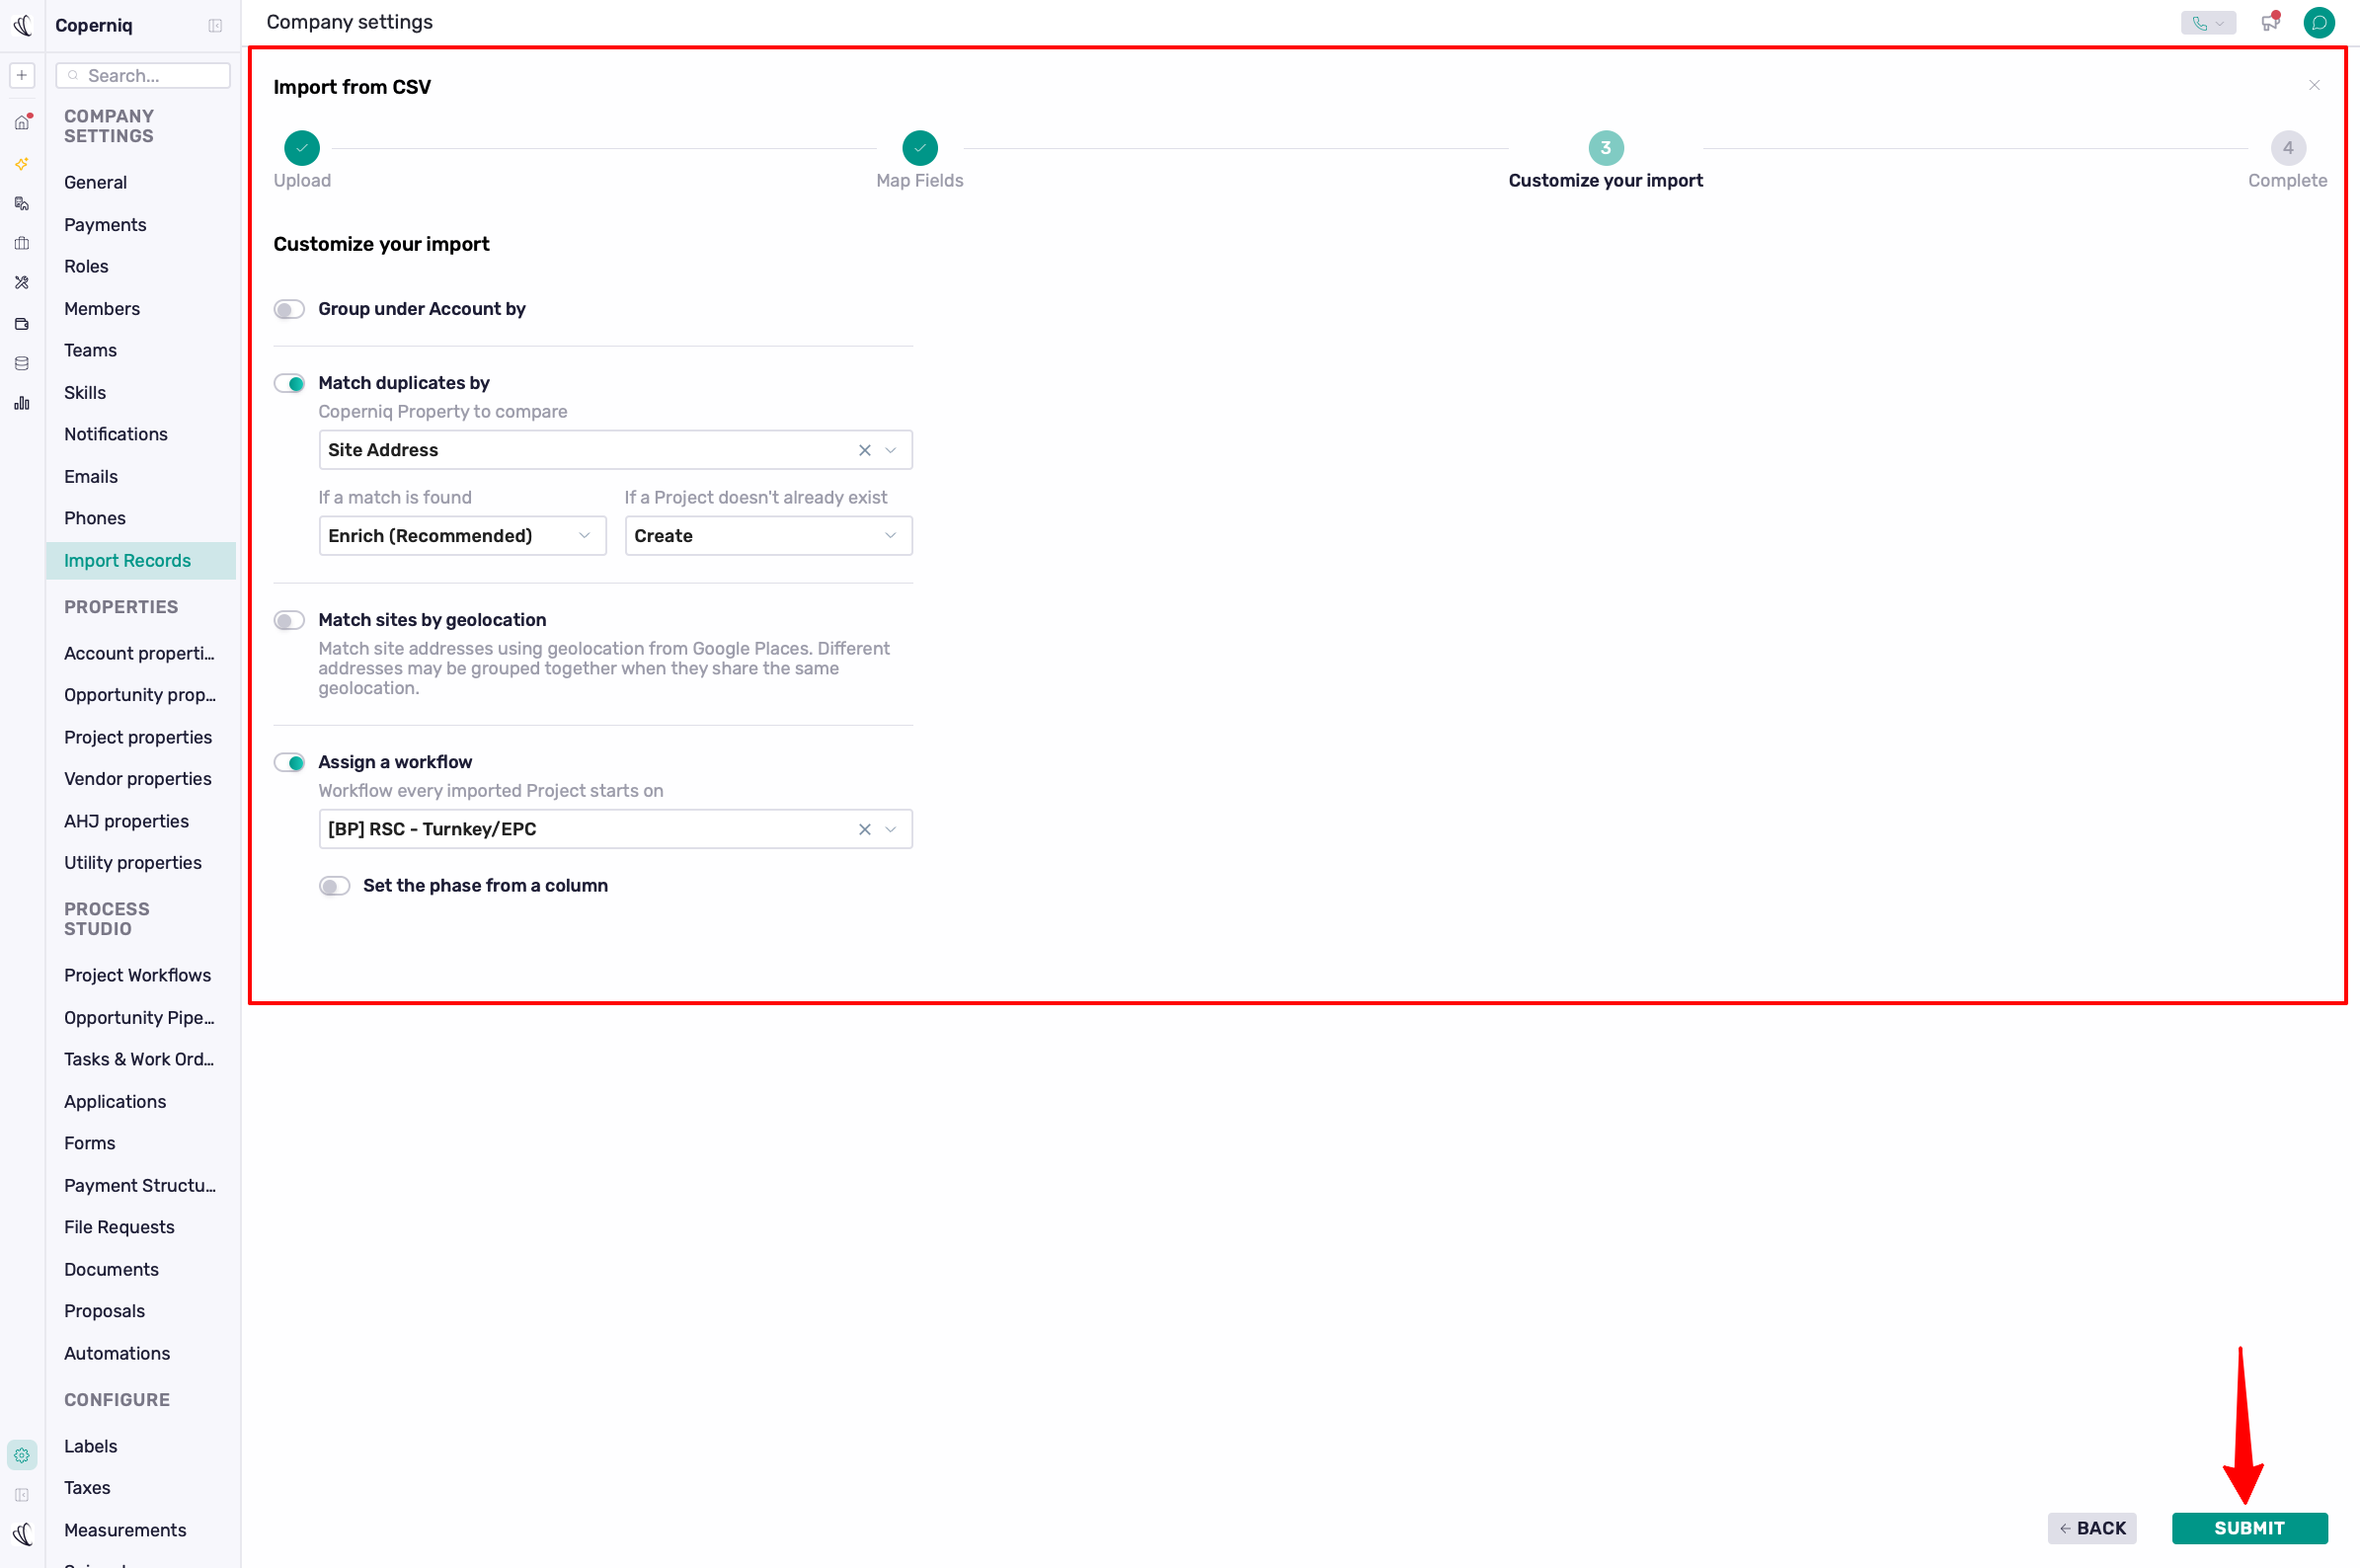
Choose how Coperniq should group records, handle duplicates, and assign a workflow.
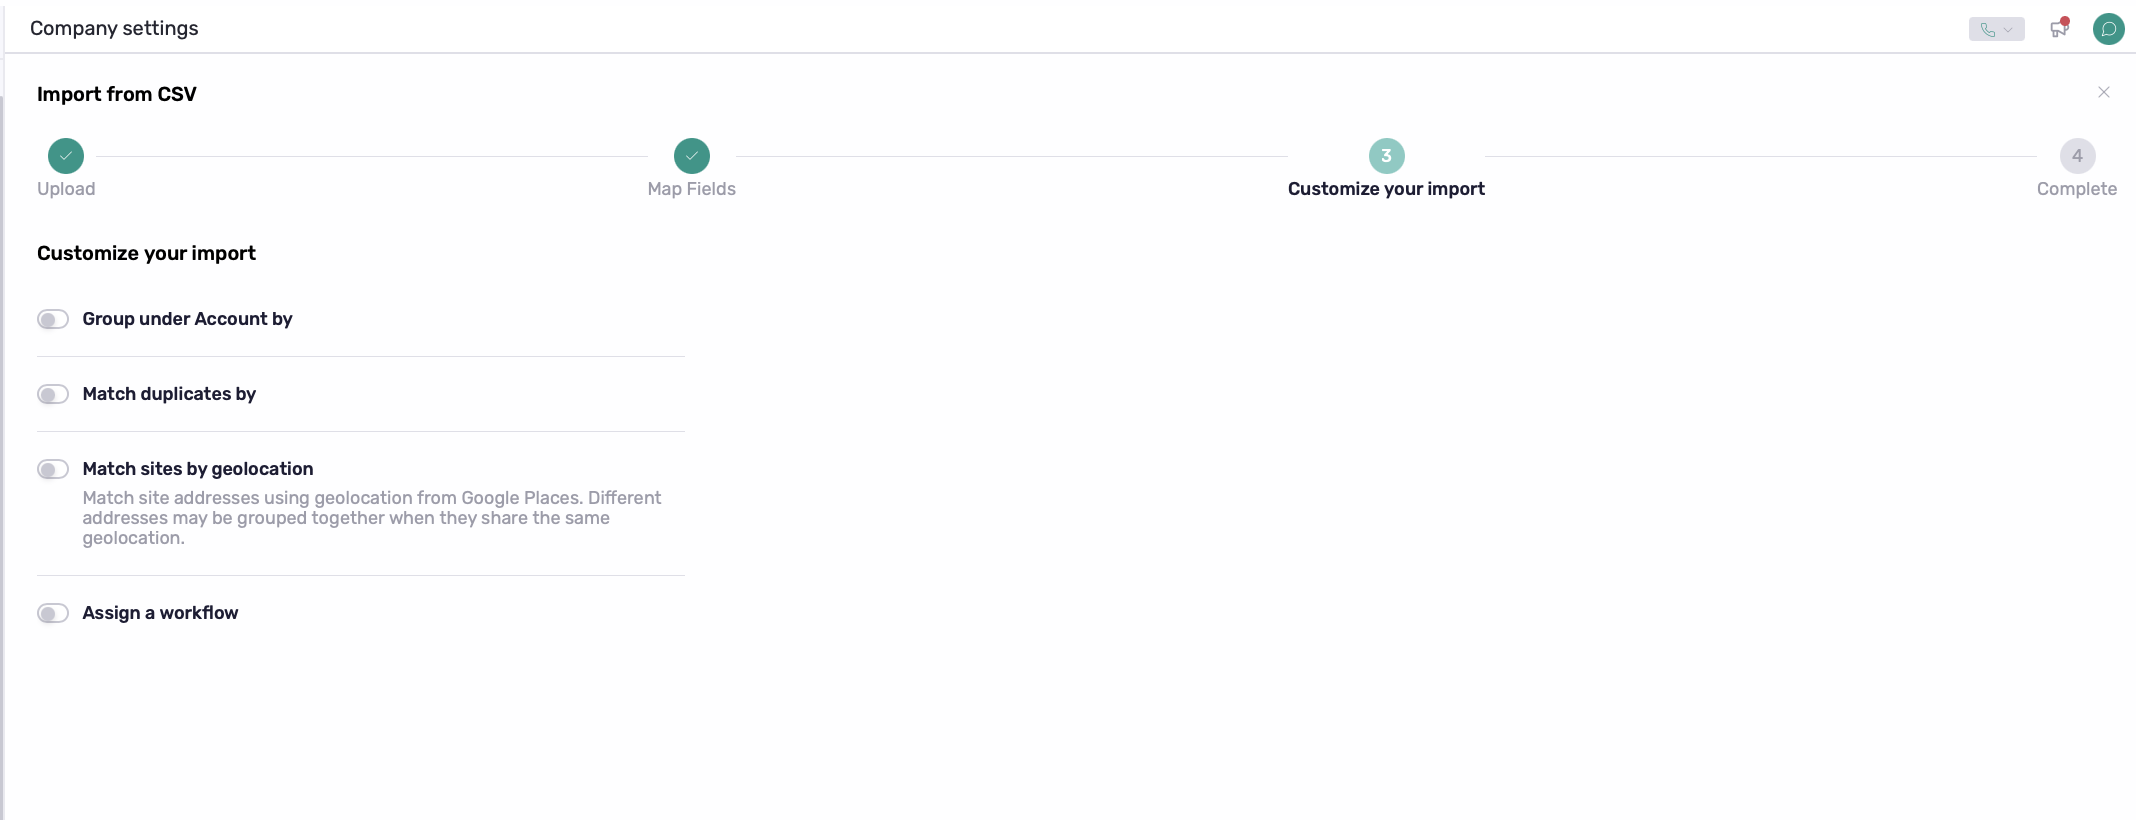
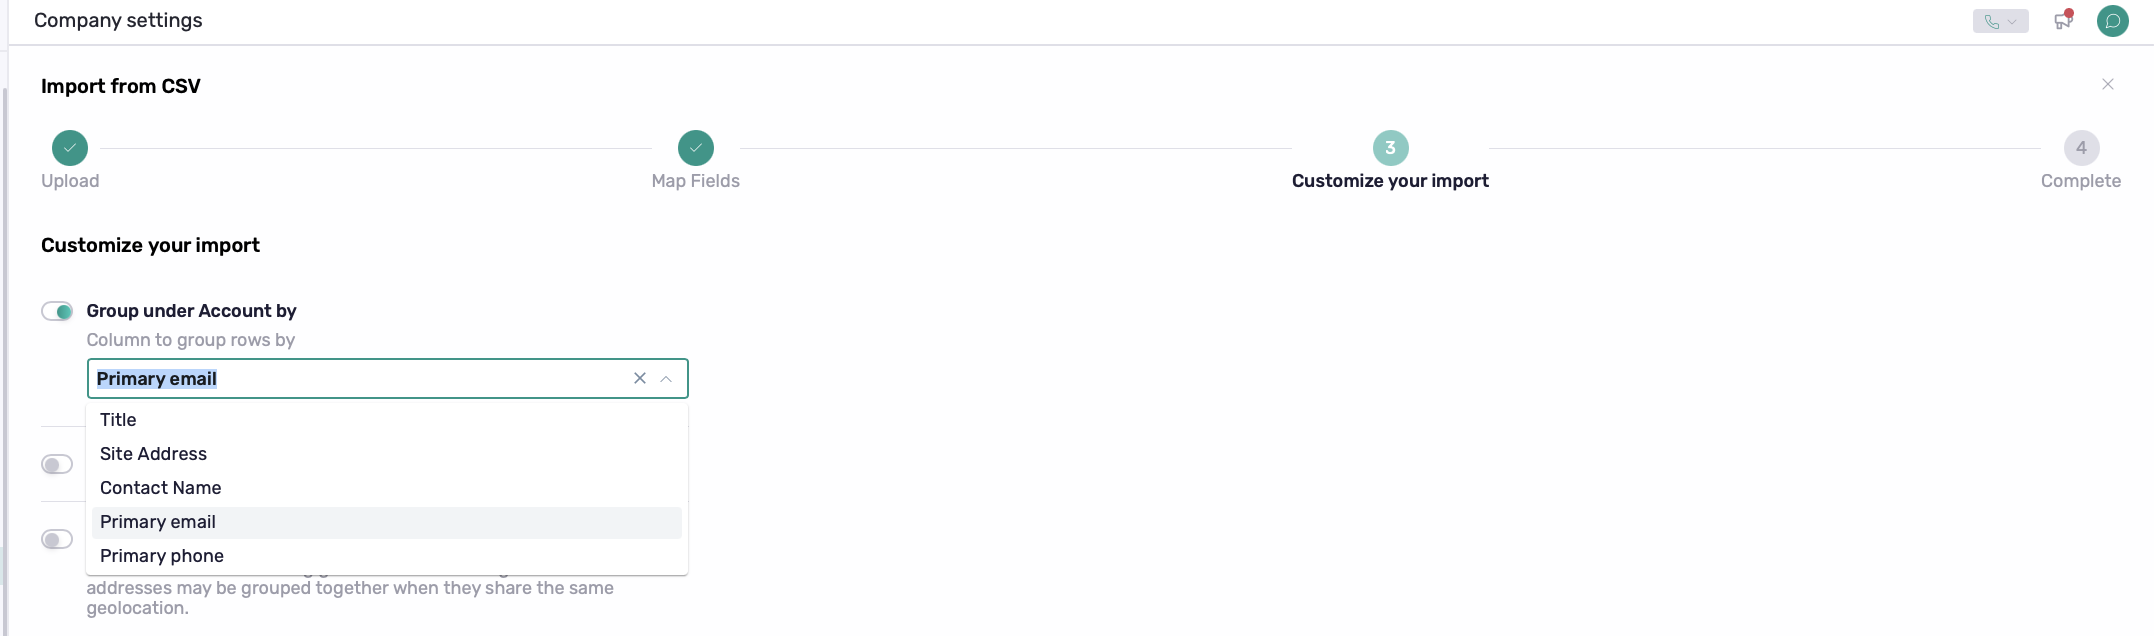
Group Under Account By
Group imported Projects or Opportunities under one Account when they share the same value. By default, this uses Primary email—records with the same email address belong to the same Account. Select another field from the dropdown if needed.
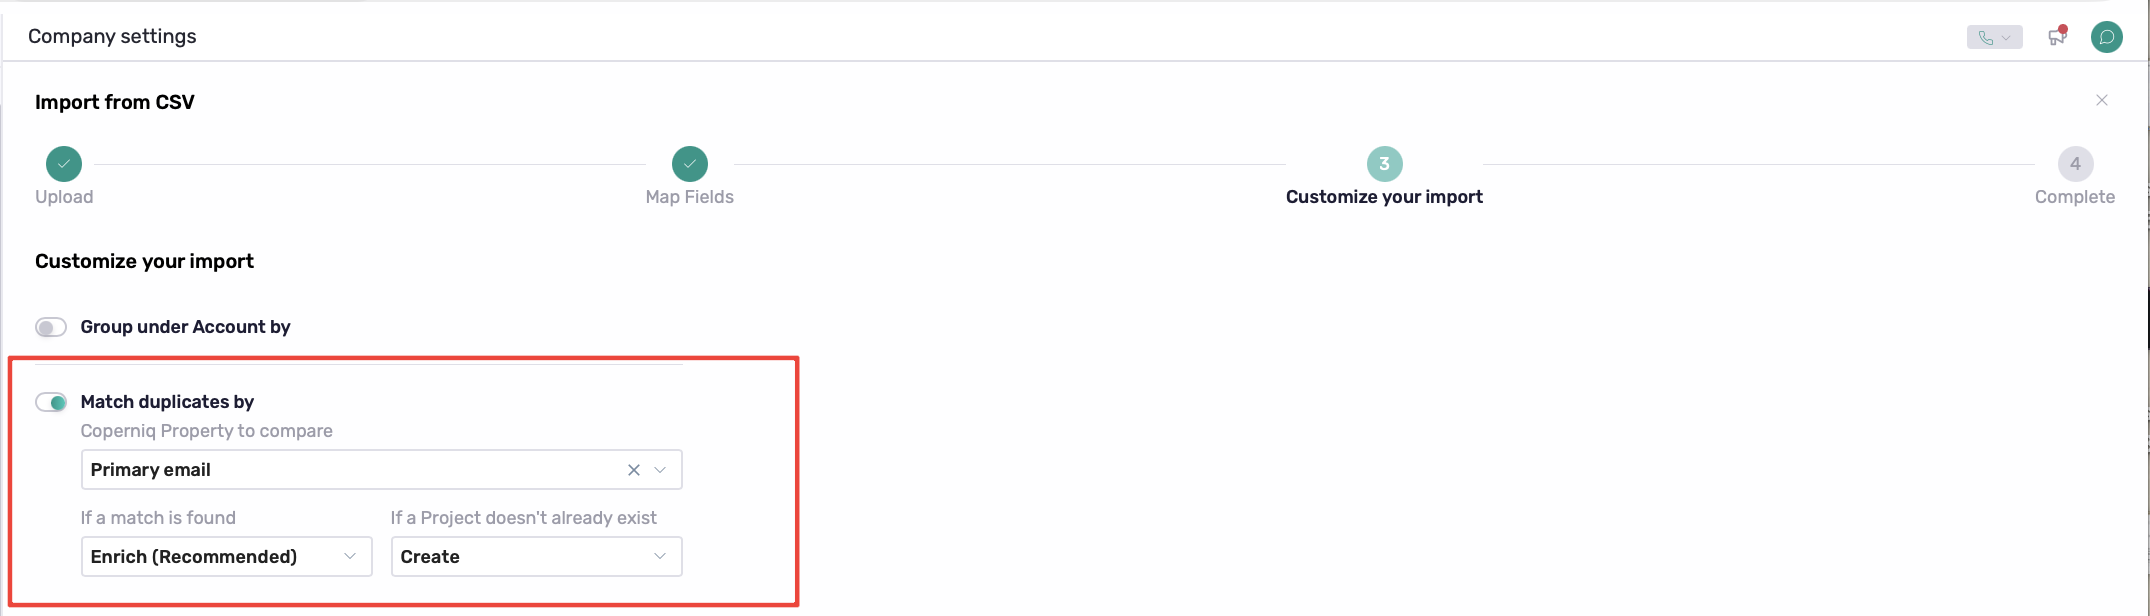
Match Duplicates By
Select the Coperniq property used to identify existing records, then choose what happens when a match is found:
Option | What it does |
|---|---|
Enrich (Recommended) | Adds missing information to the existing record. |
Replace | Replaces existing information with imported values. |
Skip | Leaves the existing record unchanged and skips the matching row. |
When no match exists, choose Create to add a new record or Skip to exclude the row.
Match Sites by Geolocation
Match site addresses using Google Places. Different addresses may be grouped together if they share the same geolocation.
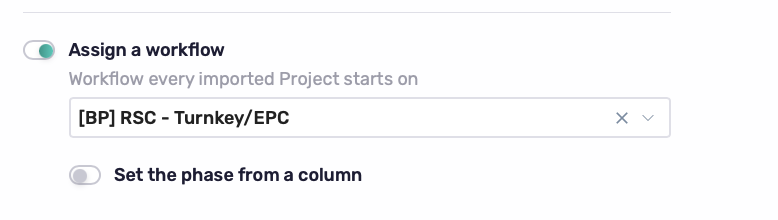
Assign a Workflow
Select the workflow your imported Projects should start on.
If your CSV includes phase values, turn on Set the phase from a column and select the column containing those values.
Review your settings and click Submit.
4. Finish and Review
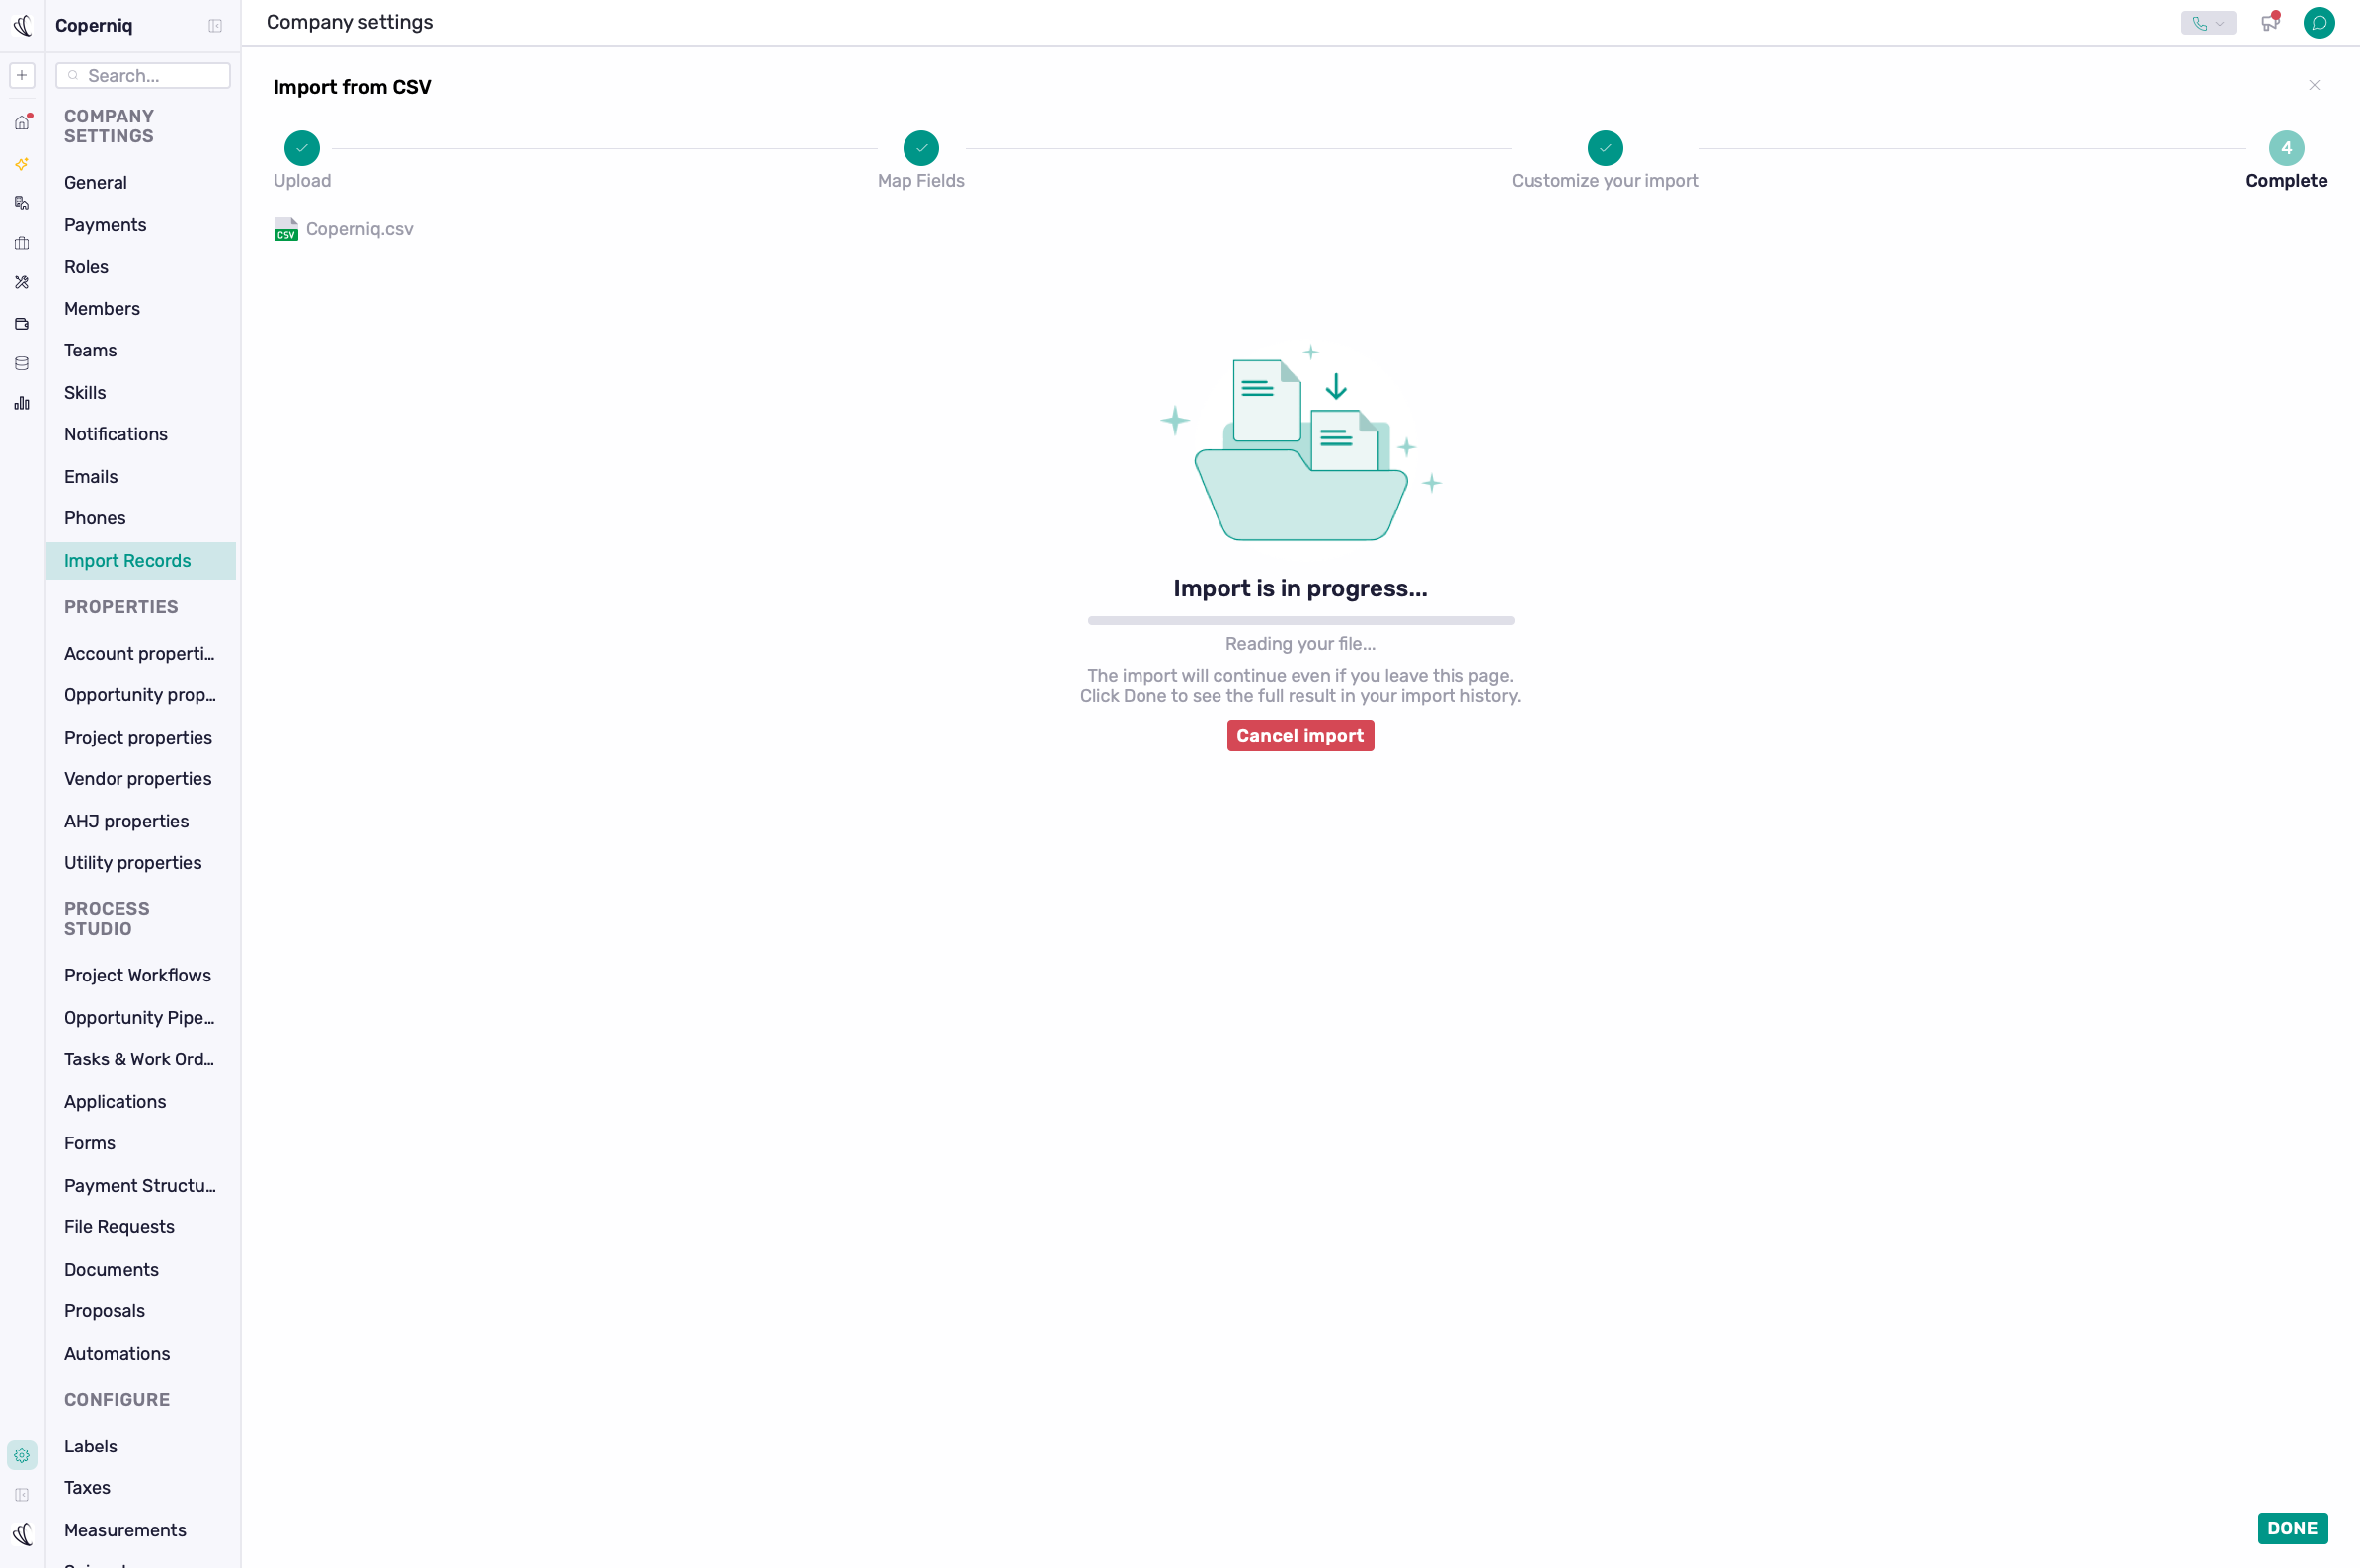
Your import may take a few minutes, depending on the file size, and will continue even if you leave the page. Once Import finished appears, click Done in the bottom-right corner.
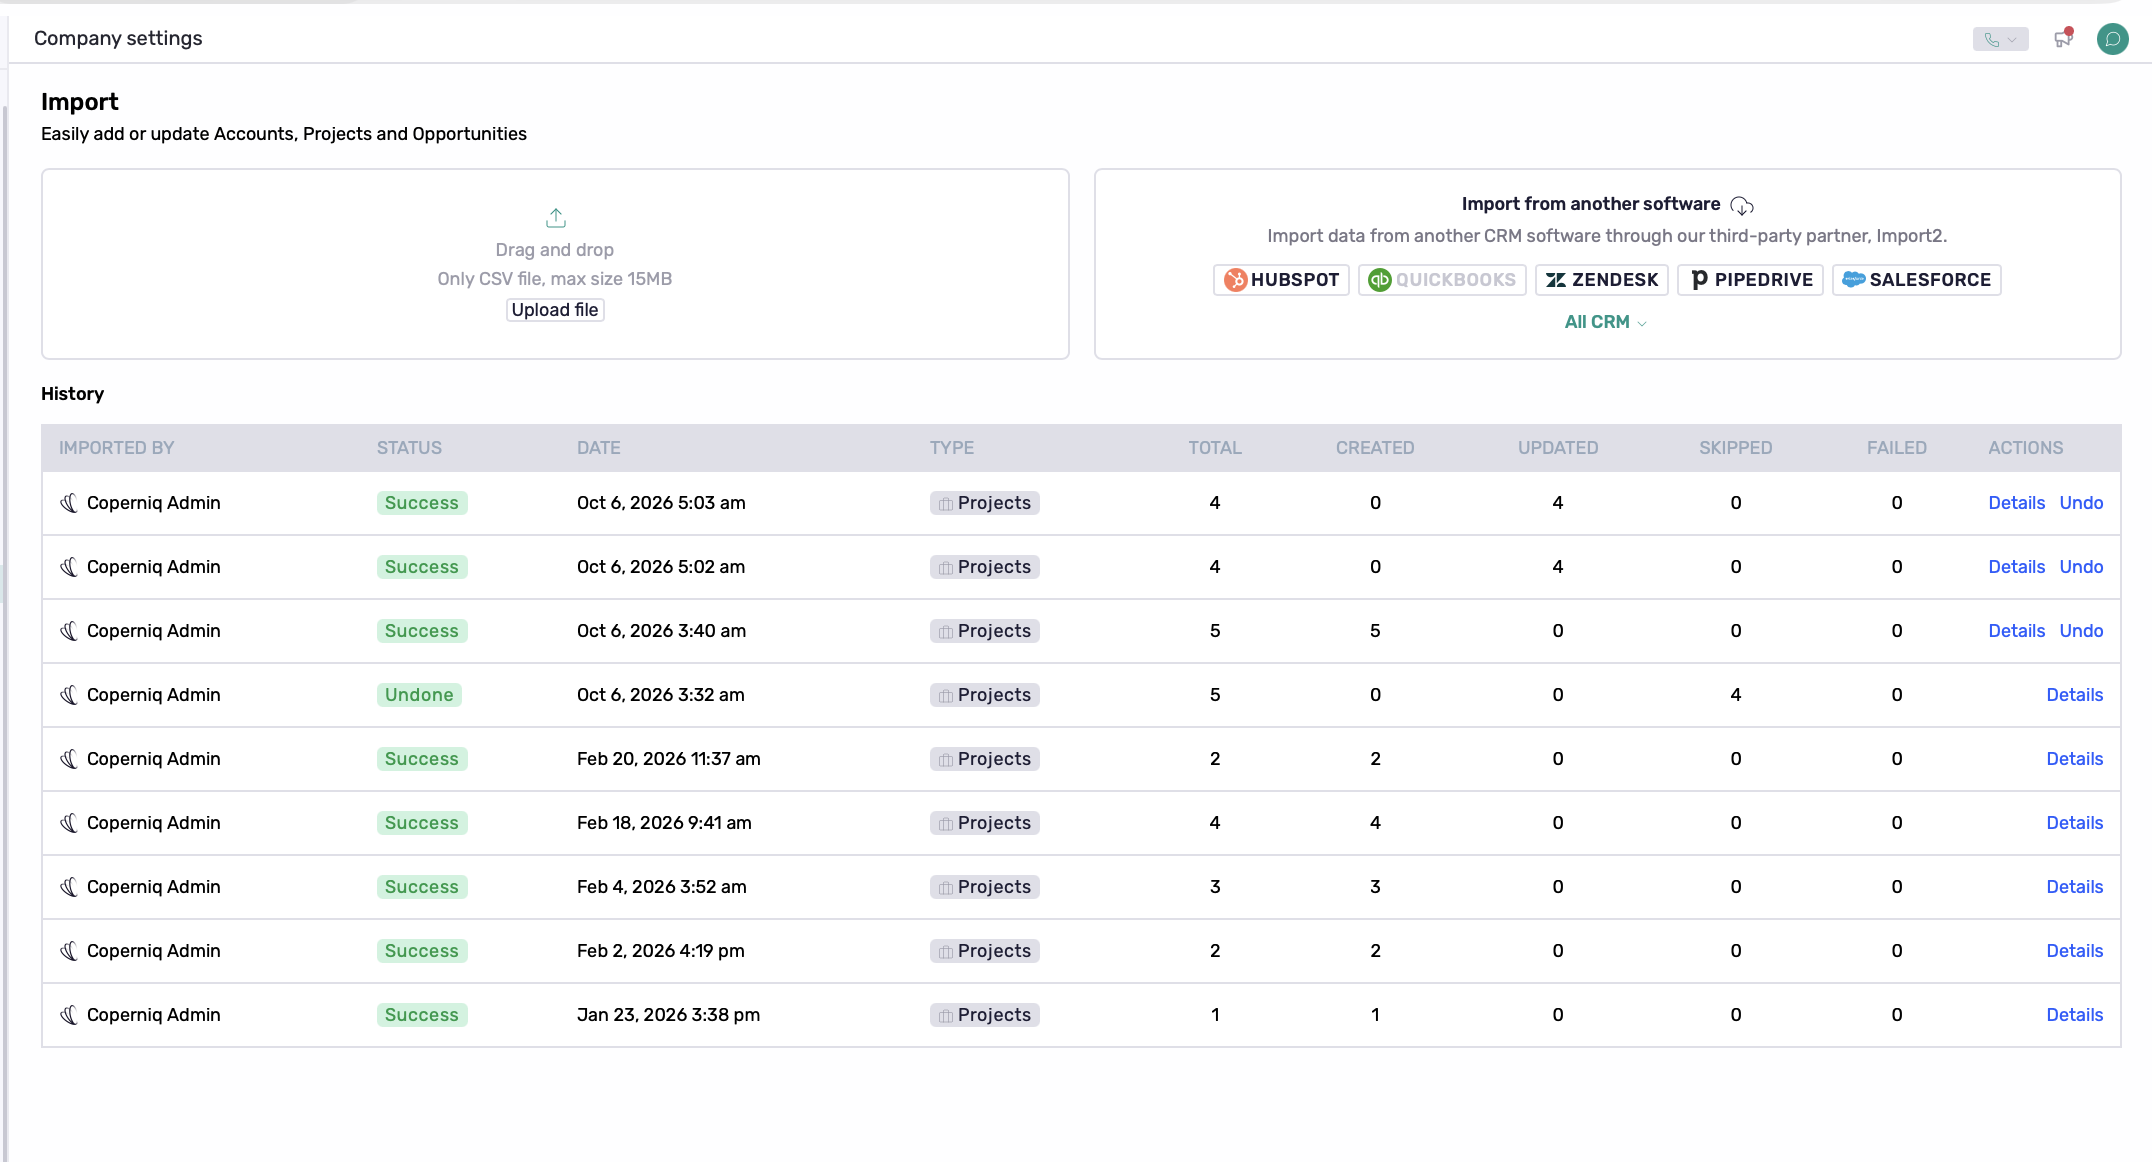
You’ll return to Import Records, where History lists your imports with their status, date, record type, total, and counts of created, updated, skipped, and failed records. You can also select Undo under Actions, when available.
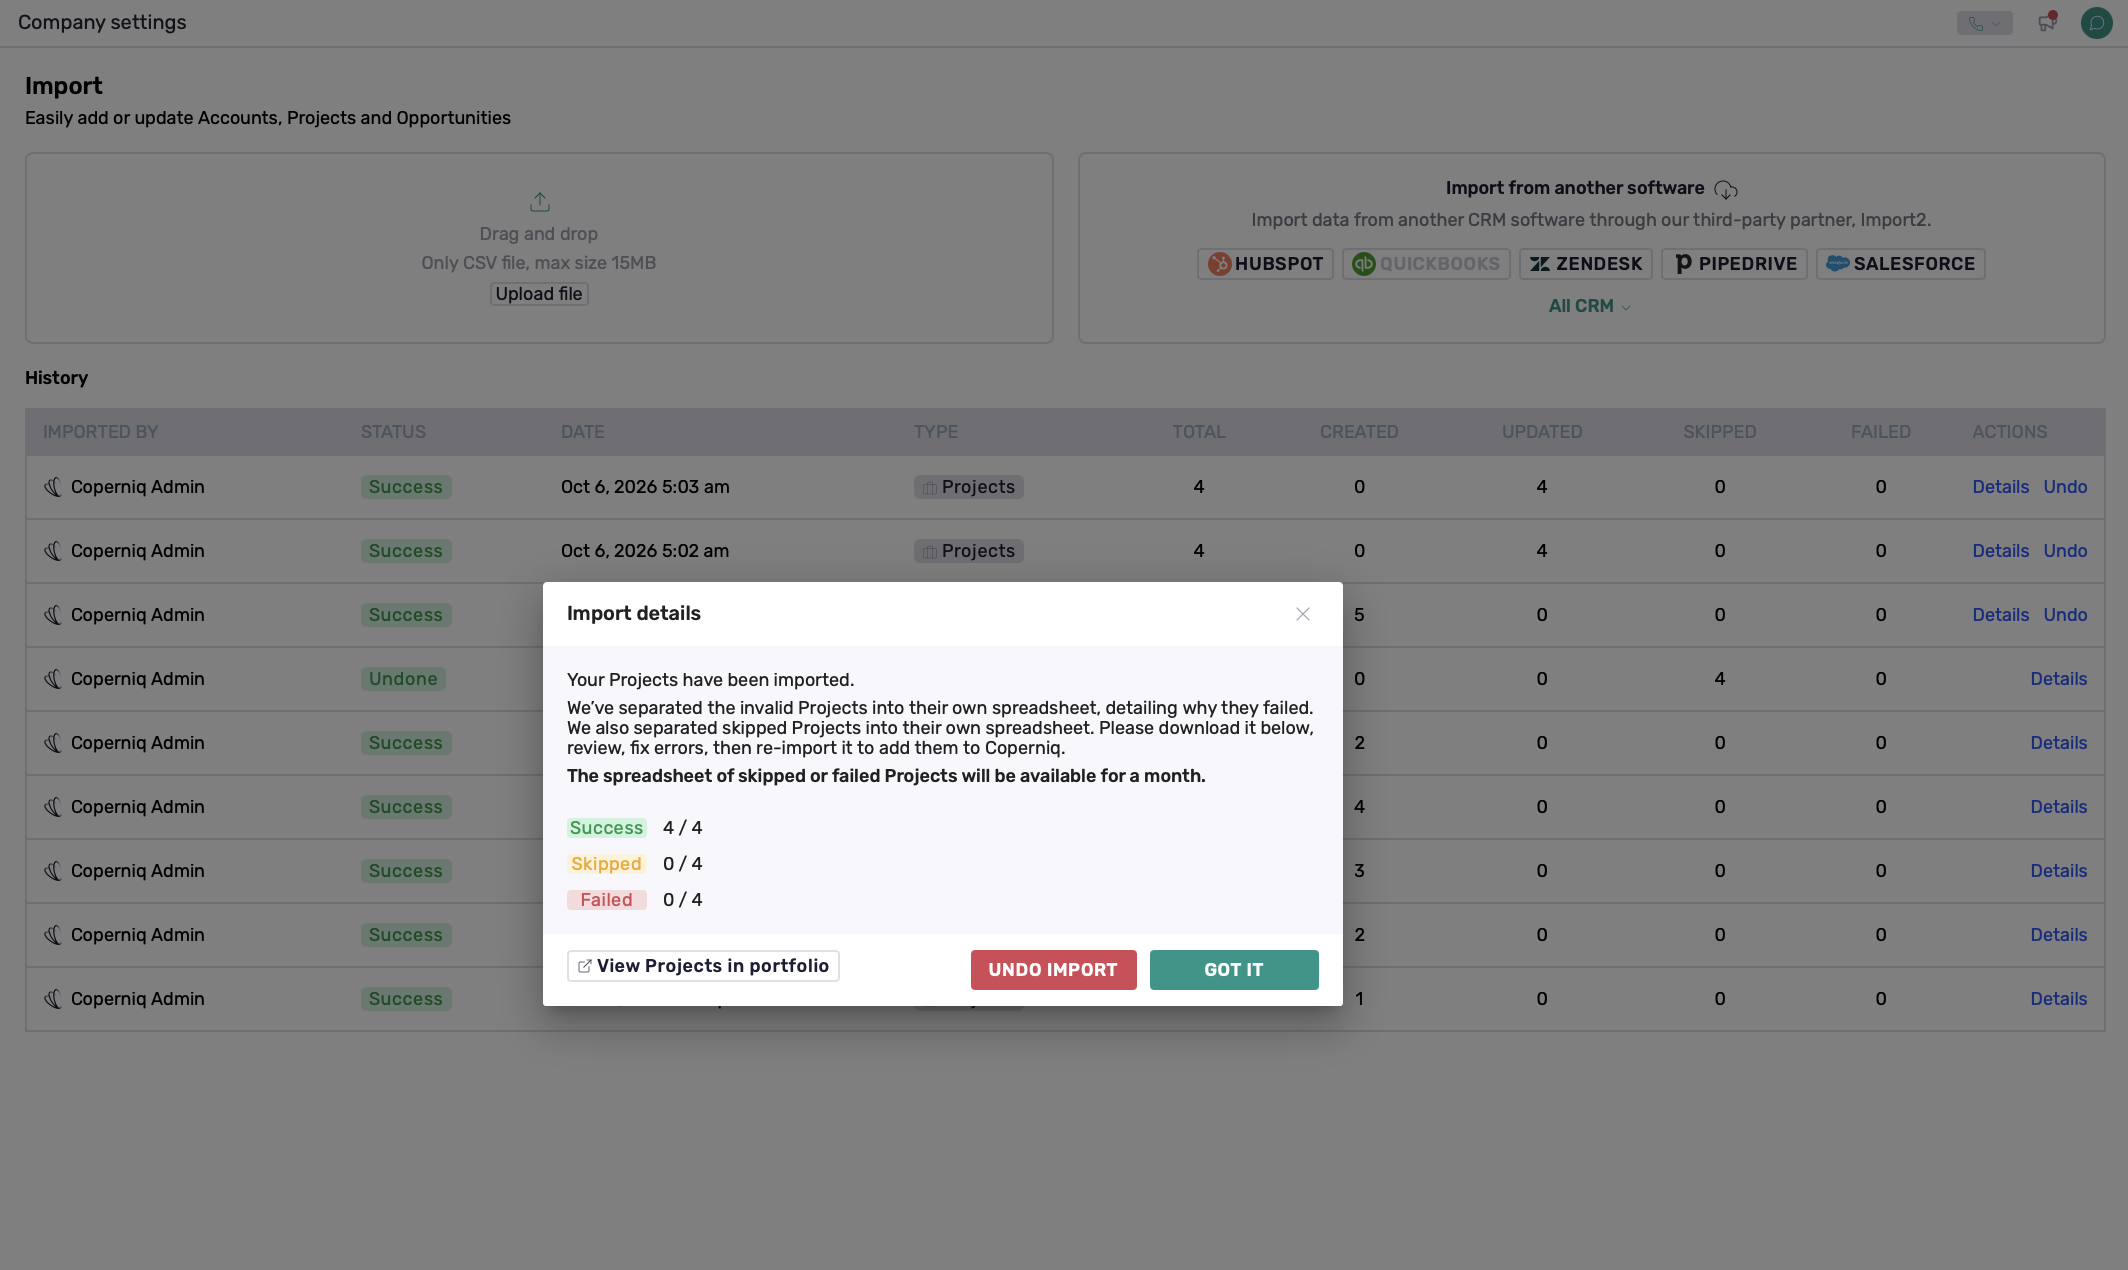
Click Details or anywhere on an import row to open its summary. Select View Projects in portfolio to see your imported Projects in Coperniq.
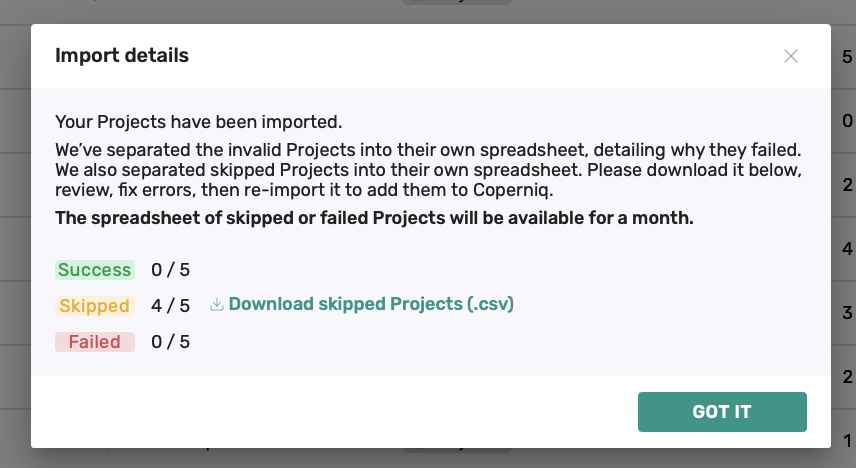
If any records were skipped or failed, download the available CSV files, review and correct the data, then re-import them. These downloads are available for one month.
Best Practices and Troubleshooting
Confirm your file is a CSV, no larger than 15 MB, and includes column headers.
Review field mappings, complete mandatory fields, and resolve any Review errors.
Check duplicate-matching settings before re-importing.
Review import results and re-import only records that need correction.
If you want to start fresh, archive existing Projects before importing replacements.
If an import appears stuck in Progress, try clearing your browser cache, then check History before restarting. If it remains stuck, contact Coperniq Support using the chat bubble in the top-right corner or email support@coperniq.io.