Schedule
Last updated: September 17, 2026
READING TIME ~3 minutes | AREA: Projects / Service → Schedule & Dispatch |
Overview
Schedule combines scheduling and dispatching in one workspace, replacing the separate Schedule and Dispatch pages. Operations teams can now review unscheduled work, place work orders on the calendar, compare user or team availability, filter the schedule, and check work order locations without switching between pages.
Schedule is available in both Projects and Service. The Projects workspace displays field and office work orders, while the Service workspace displays service work orders. This keeps each schedule focused on the work managed by that area.
This article covers
1. How to access Schedule from Projects or Service
2. How the unscheduled queue, calendar, saved views, and map work together
3. How to schedule, assign, and reschedule work orders
4. How Group by None, User, and Team change the calendar
5. How to use search, filters, calendar controls, and map layers
Access Schedule
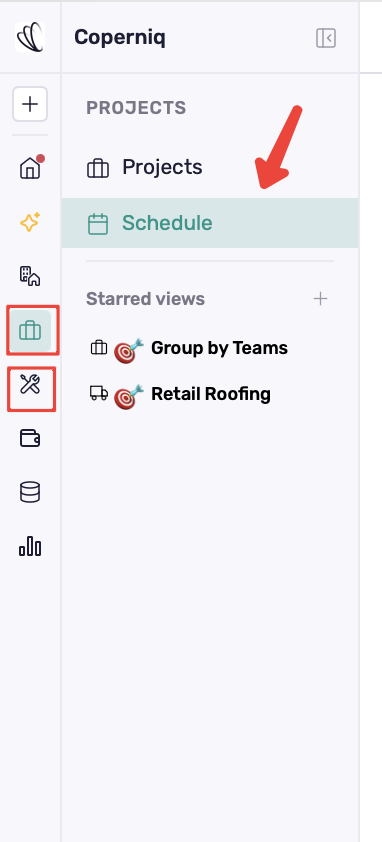
You can open Schedule & Dispatch from either the Projects or Service section:
From the left-hand menu, click Projects/Service.
Select Schedule.
Understand the Schedule workspace
The page places the scheduling queue and dispatch calendar side by side so work can move from unscheduled to scheduled without leaving the view.
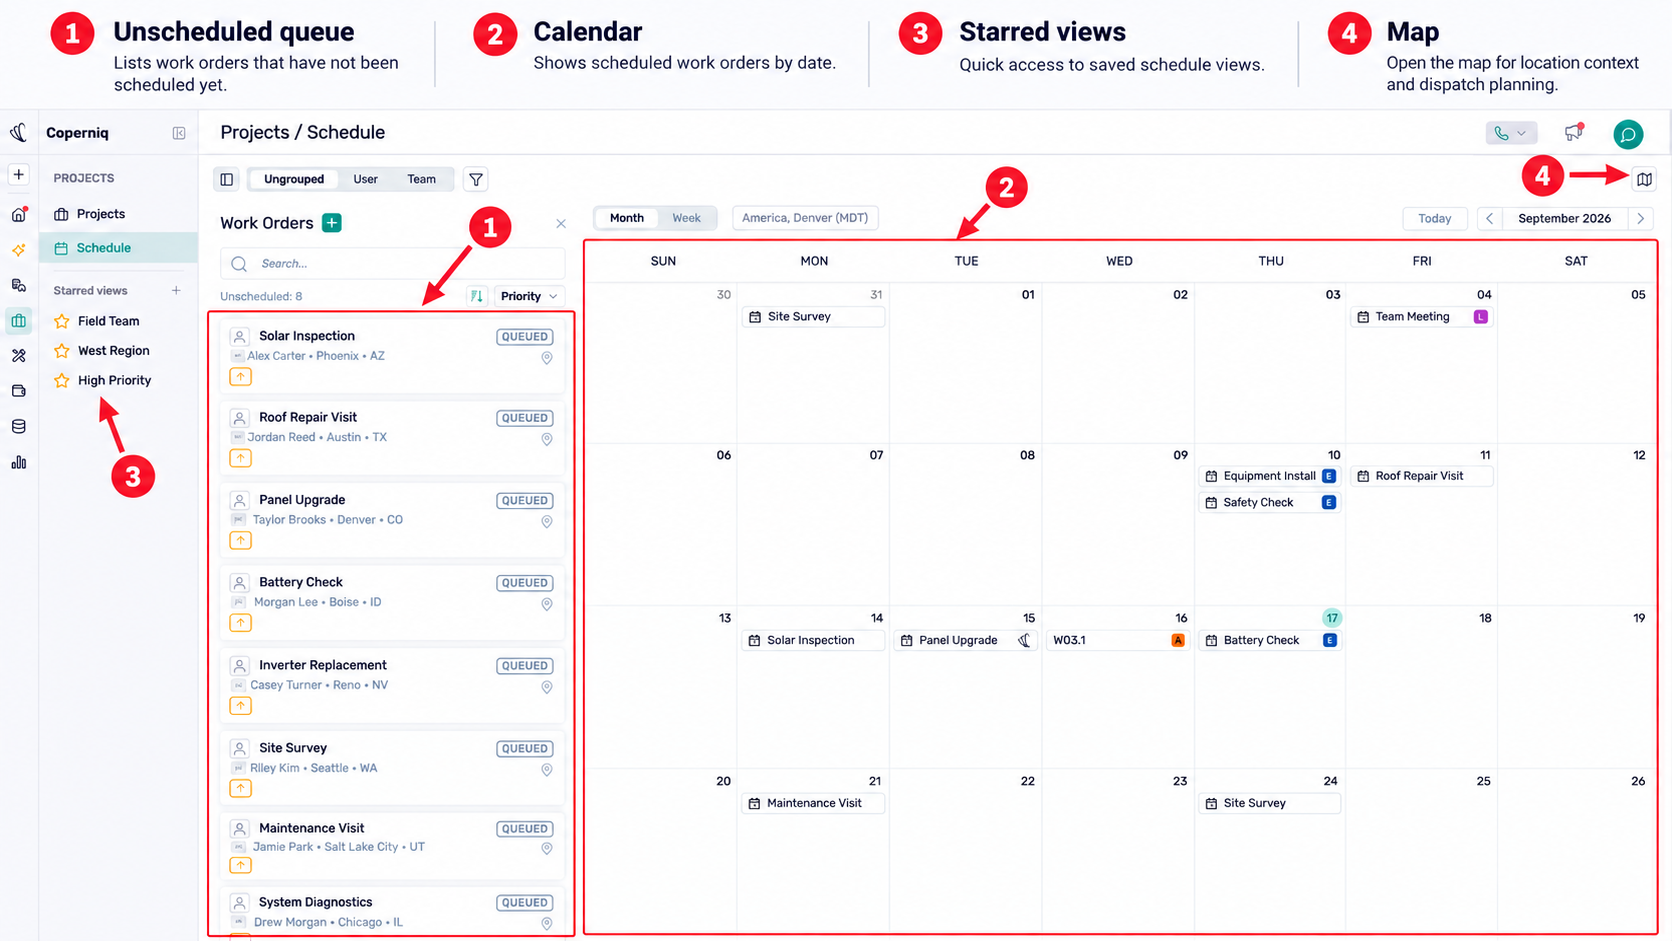
Unscheduled queue: The left panel lists work orders that do not yet have a scheduled date. Its header shows how many work orders are currently listed. Cards display key information such as the work order number, title, location, and Queued or Assigned status. Collapse the panel from its header when more calendar space is needed.
Calendar: The main panel shows scheduled work orders by date. Event cards provide a compact view of the scheduled work and can be opened for more detail.
Views: The far-left panel lists saved schedule views. Use the view search to quickly reopen a configuration used by your team.
Map: Click the map icon in the top-right corner, just below the green support bubble, to open the map when you need location context for dispatching or route planning.
Schedule or reschedule a work order
10. Find the work order in the Unscheduled panel. Use Search or filters if the queue is long.
11. Drag the work order onto the required date in the calendar.
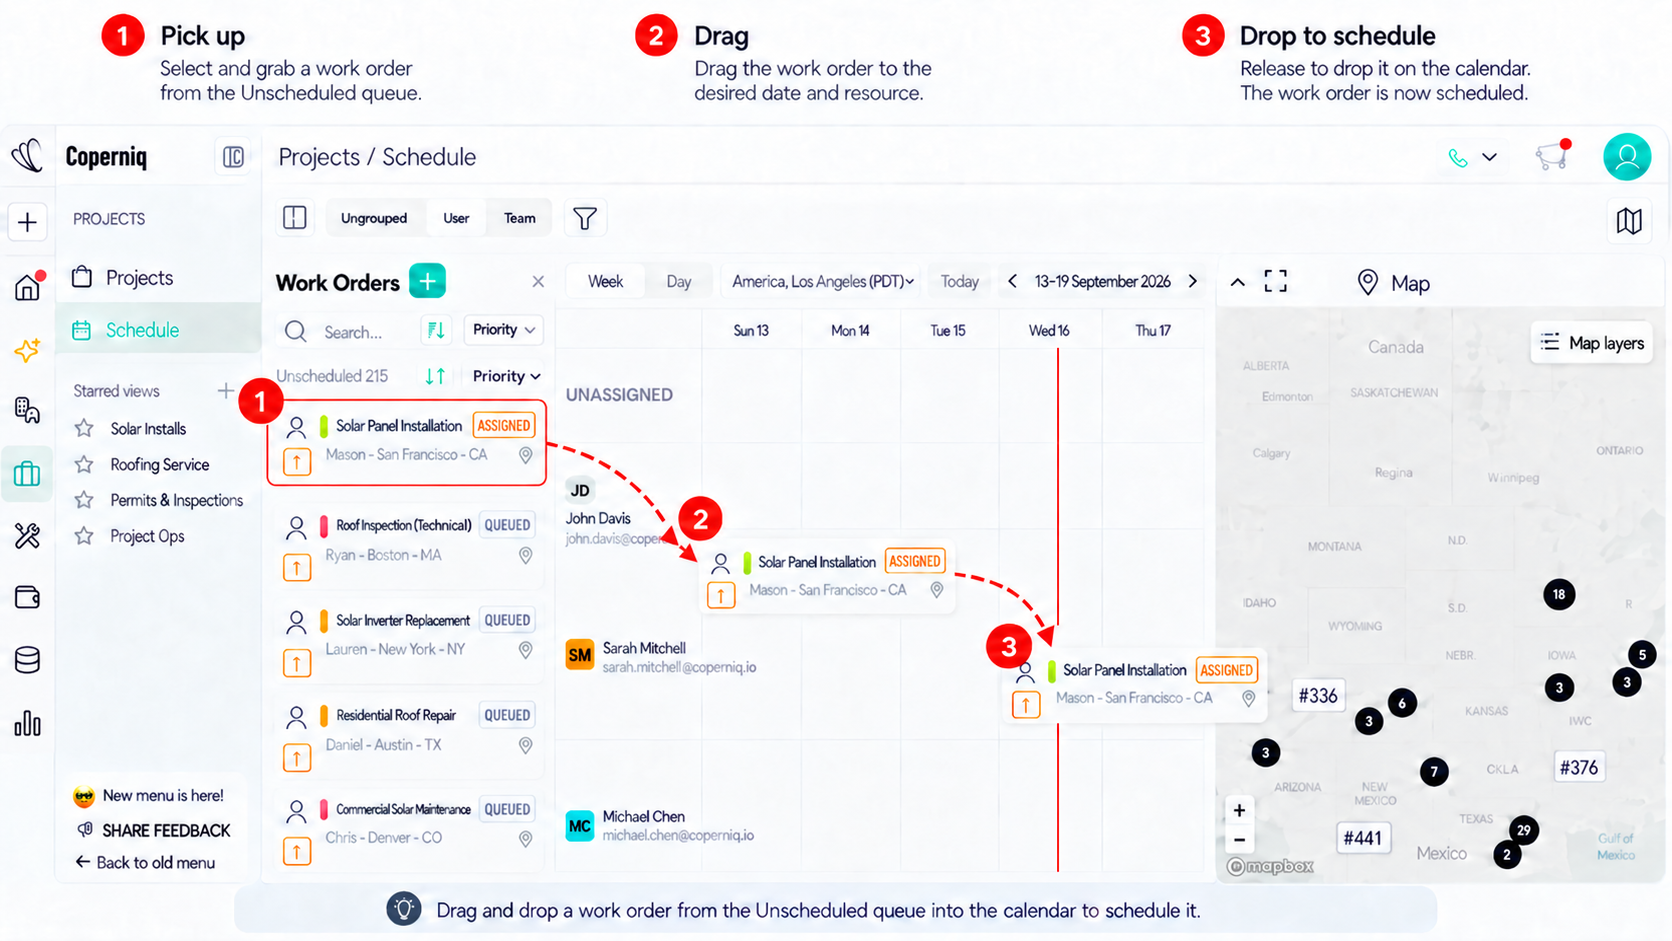
12. When the schedule is grouped by User or Team, place the work order in the appropriate resource row to dispatch it with that assignment context.
13. To reschedule, drag an existing calendar event to a different date or resource row.
Group the calendar by user or team
Use Group by to organize the calendar around the people or teams doing the work. This makes it easier to compare availability, identify unassigned work, and balance workloads.
Group by | How the calendar is organized | Best for |
|---|---|---|
None | Standard date-based calendar in Month or Weekview | Reviewing overall schedule volume |
User | Separate rows for each user, plus an Unassignedsection | Balancing individual workloads and assigning work to specific people |
Team | Users grouped under their teams, plus an Unassigned section | Scheduling by crew or department while still seeing individual assignments |
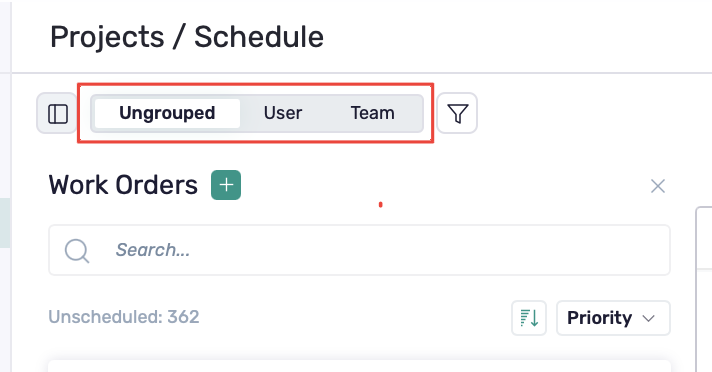
When grouping by Team, you can expand or collapse each team to focus on the crews you’re actively scheduling. Team headers also show the number of resources in each team.
Search and filter the schedule
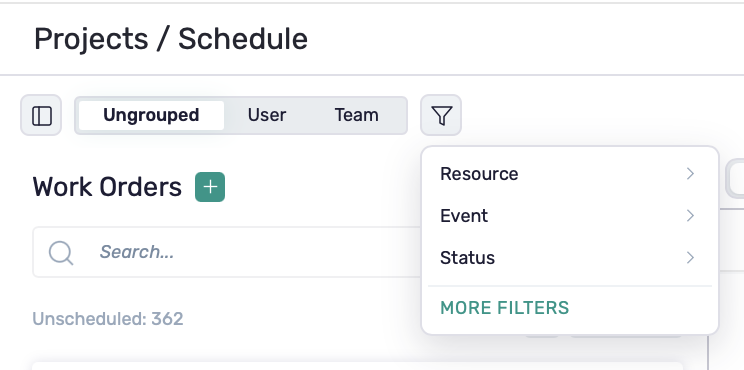
Use Search and the funnel icon to quickly narrow down the schedule and focus on the work that matters. You can apply multiple filters at the same time to create a more focused view.
Search: Find work orders using information such as the work order number, title, customer, or location.
Resource: Filter by users, teams, or other resources. Turn Include Collaborators on to include collaborators or off to exclude them.
Event: Filter by event type, such as Field Work Orders.
Status: Filter work orders based on their current status.
For more options, click More filters. Depending on your setup, additional filters may include:
Record: Filter by Project Status, such as Active, On Hold, Completed, or Canceled.
Labels: Show work orders with specific labels.
Priority: Narrow the schedule by priority level.
Other filters: Use any other available filter options to further refine the schedule.
Combine filters as needed to create the view that best matches the team, project status, work type, priority, or other criteria you want to manage.
Calendar controls
14. Use Month or Week when Group by is set to None. Use Week or Day when grouping by User or Team.
15. Select Today to return to the current date.
16. Use the left and right arrows to move between months, weeks, or days. The date label shows the period currently displayed.
17. In supported views, the red indicator marks the current date position.
Use the map for location-aware dispatching
Open Map from the right side of the page to compare the schedule with work order locations. This helps dispatchers identify nearby work, reduce unnecessary travel, and review geographic coverage before assigning resources.
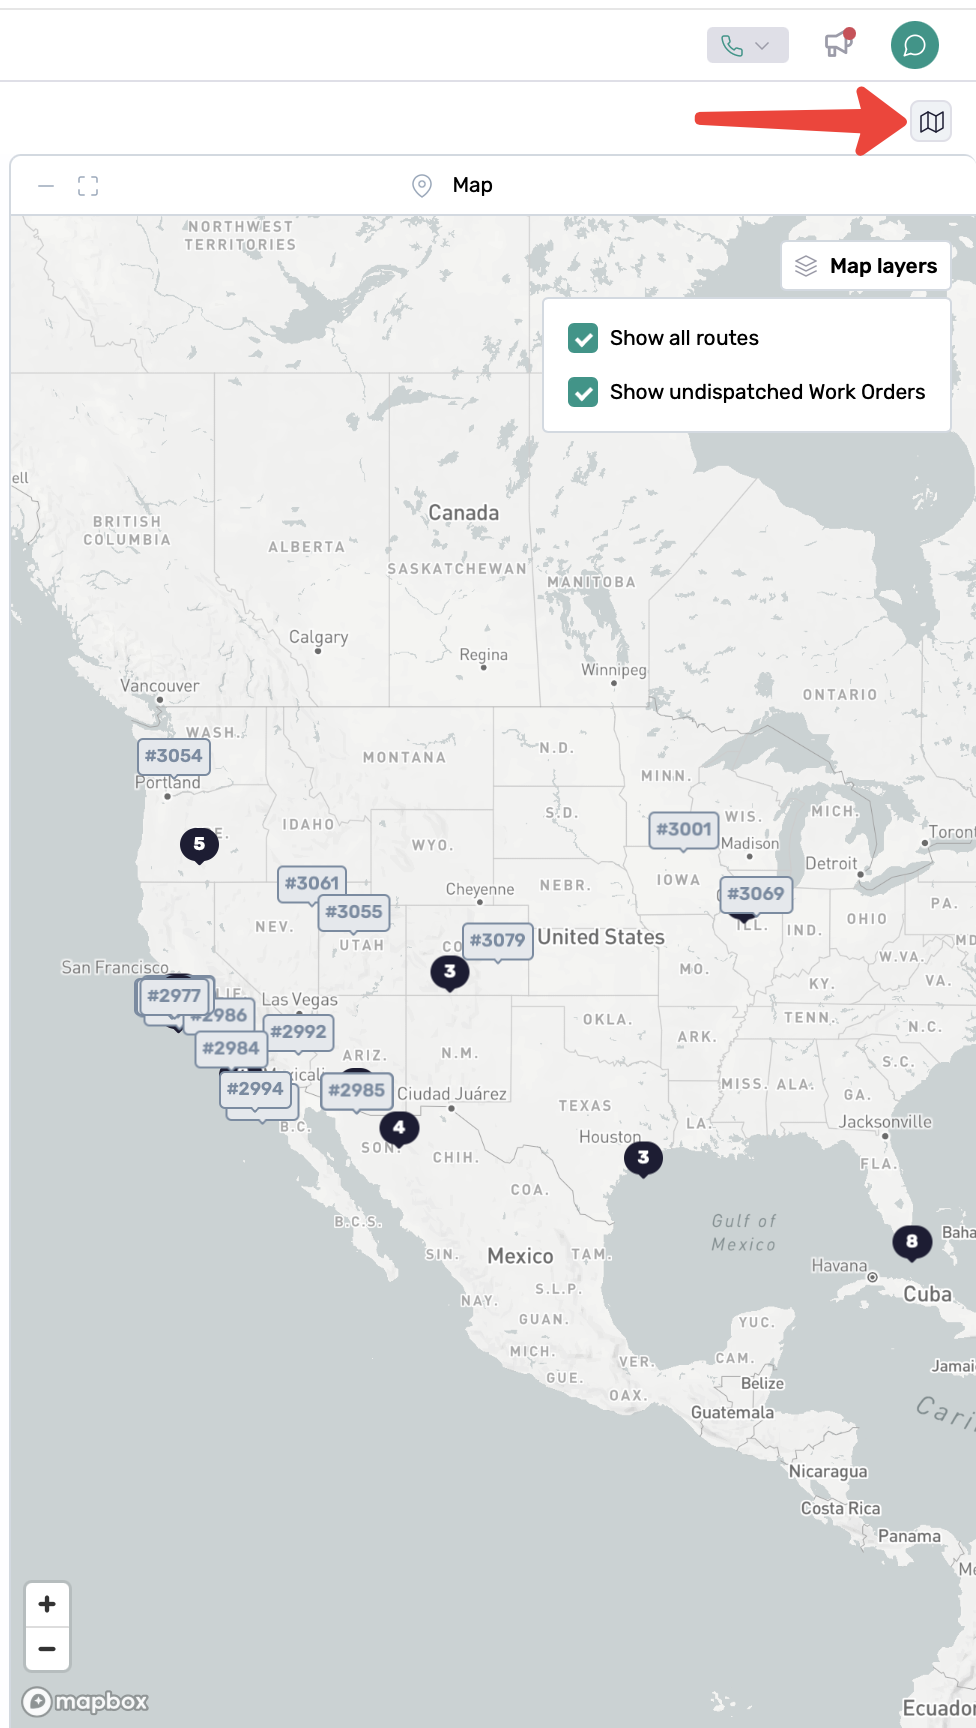
Individual markers: Markers labeled with a work order number identify a specific work order location.
Clusters: Dark numbered circles combine nearby work orders. Zoom in to separate the markers and inspect a smaller area.
Show all routes: Displays the available route overlays for the current map view.
Show undispatched Work Orders: Adds work orders that have not yet been dispatched so they can be considered alongside scheduled routes.
Map controls: Pan or zoom the map and use the panel controls to expand, reduce, or close it when more calendar space is needed.
A work order needs a usable address to appear on the map. If a location is missing, review the address stored on the related record.
Save views and create work orders
Save: After changing the grouping or filters, click Save in the top-right corner when it appears. This preserves the current view configuration so you can reuse it later.
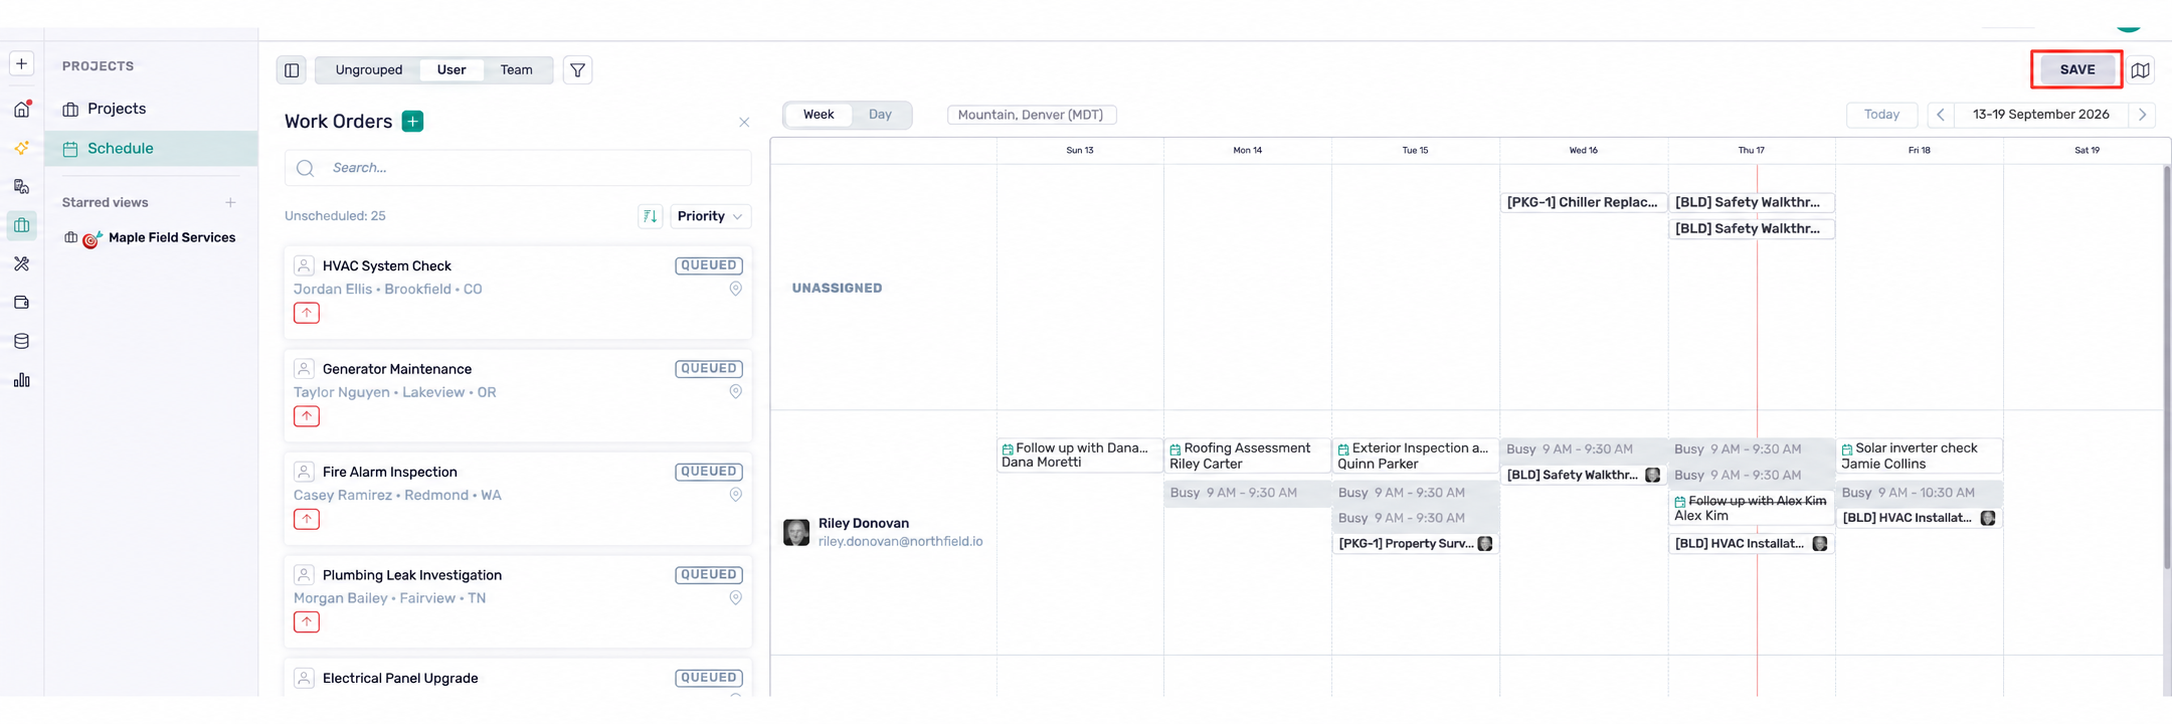
Saved views: Use the Views panel on the left to open saved schedule configurations. The search box helps locate a view when several are available.
Create a work order: Use the action button in the top-right corner to create a work order.
Best practices
Choose the workspace first: Projects for field and office work orders, or Service for service work orders.
Use Group by User for individual capacity planning, Team for crew-level planning, and None for a simple date-based overview.
Combine filters before dispatching so the unscheduled queue and calendar stay focused on the relevant work.
Confirm the work order address, resource assignment, status, labels, and priority before scheduling.
Use the map to compare nearby work and routes before assigning a resource, especially across large service areas.
Save commonly used groupings and filters as views so dispatchers can return to the same setup quickly.